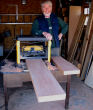
 | 1 First, the boards are planed to thickness. I like to make signs at least 1-1/2 inches thick to guard against splitting and warping. | 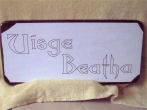 | 5 An adhesive paper mask is applied to the face of the sign. The pattern is transferred to this paper. |
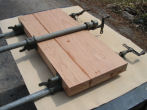 | 2 The boards are glued with waterproof adhesive, and clamped together. |  | 6 The lettering and motif are hand-carved, THROUGH the paper mask, using traditional double-bevel chisels. The carved areas are then sealed. |
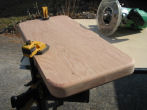 | 3 The sign is shaped, the edge is fluted by router if required, and the surface is sanded. This sign is made of cherry wood. |  | 7 The lettering is either painted in colours which contrast with the sign background, or gold leaf is applied to the carved letter "channels" |
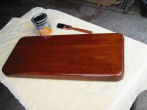 | 4 The stain and several coats of varnish are applied. Yes, the final finish is applied BEFORE the lettering or motif is carved. | 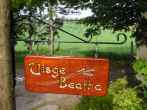 | 8 The painted or gilt lettering is outlined in black, and the sign is hung in place (or mounted on clips if required), using stainless steel hardware. |


